
So I’ve recently taken up a project in medical imaging. And as such, my team and I were invited to bring in some objects of our choice to the lab so that we can take some CT scans to use as test data.
CT stands for computed tomography. How a CT scanner works is you place the subject (normally a human) on a platform which is slowly moved into this tunnel-like machine. The inside of this machine rotates to create a lot of x-rays from different angles. These are sent to a computer which combines them to create image slices (cross-sections) of the subject.
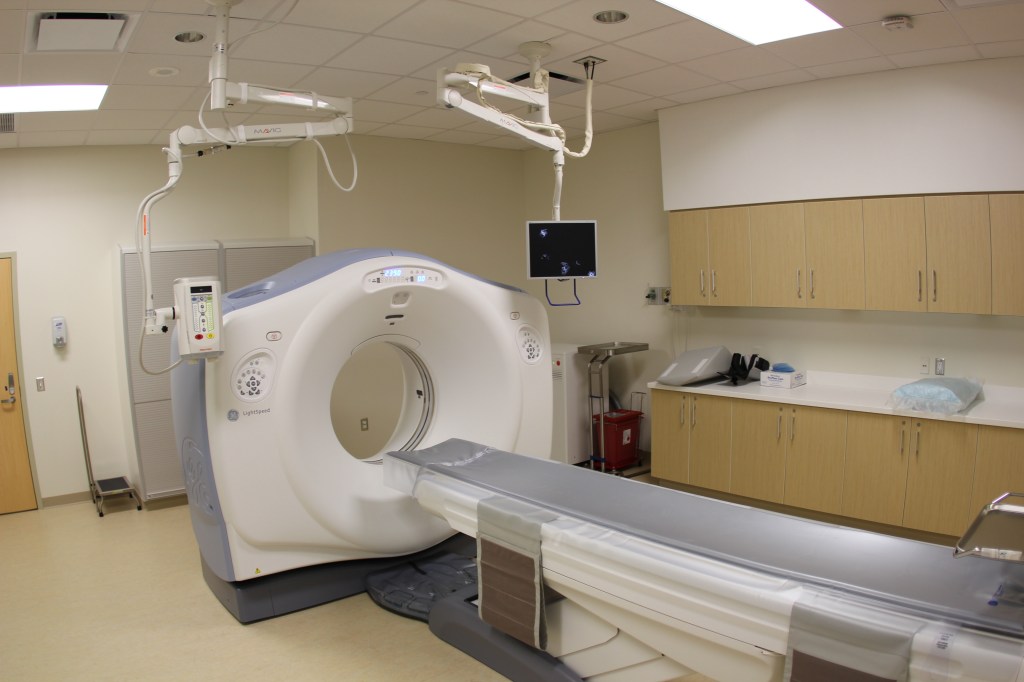
The advantage of using this device over a single x-ray scan is that you can scroll through the 2D images to obtain information on the depth of any features. It provides a fuller picture of what the object looks like in 3D. And that is exactly what is going on in the CT scan gif of the Rubik’s cube that I made.
There are some interesting things to be seen in the gif. The brightness corresponds to the density of the material in that slice, the brighter the image, the more material there is in that slice. The gif scrolls through the slices and during this process it is plain to see that the image is dark most of the time. In other words, the cube is mainly air.
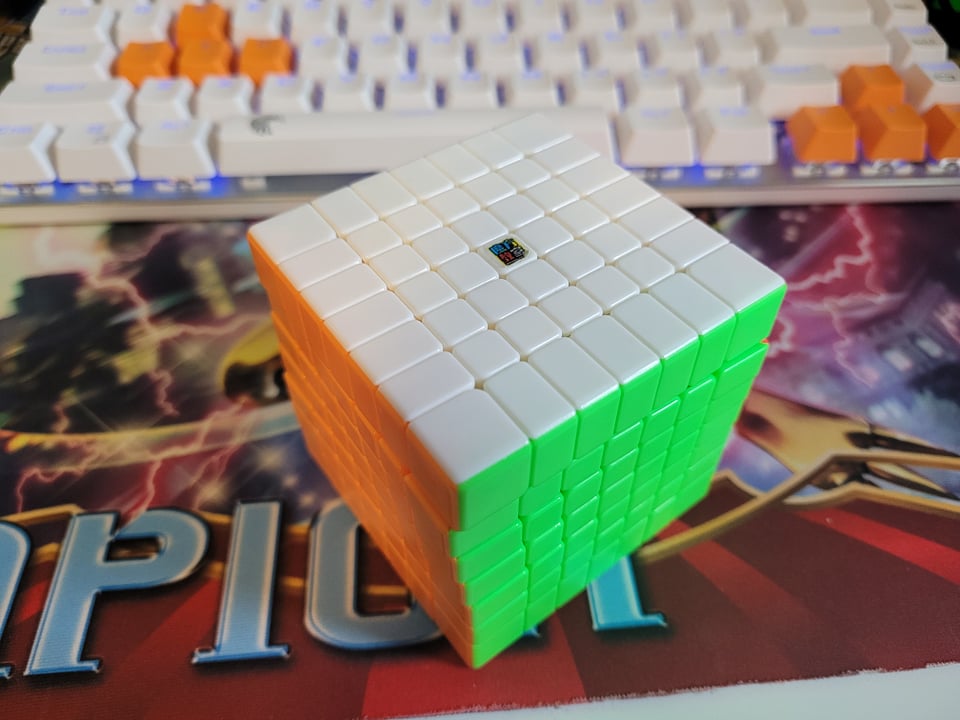
Now, this makes total sense. For this scan I chose a MoYu MeiLong 7×7. This isn’t the fastest or best speed cube out there, but it is very high value. And by all means it is still a very good and fast cube. It is designed to be very lightweight so that it can turn faster with less friction. But there are even more features that we can see from the scans that show this is designed to move fast.
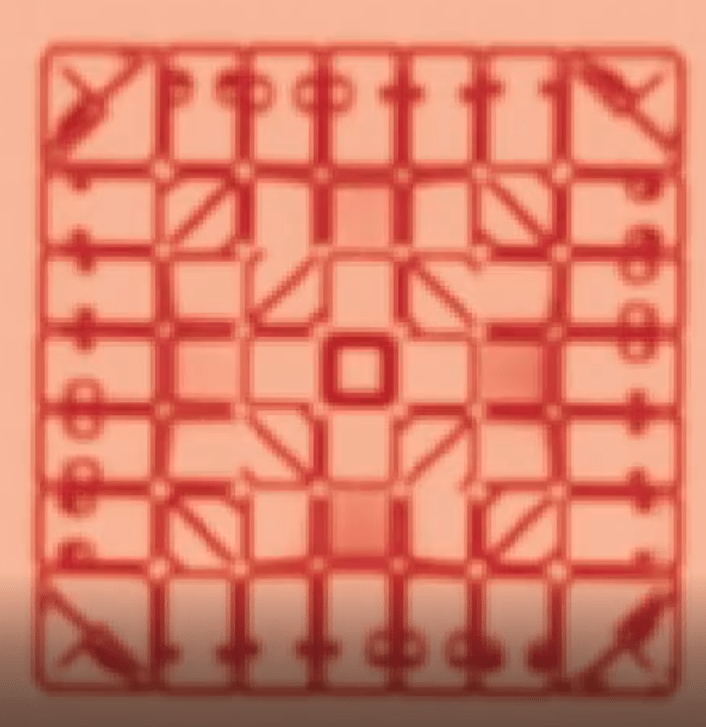

Above are scans from just past the surface of the cube. This is still in the very dense regions where we are still above the inner core and what we can see are some very interesting features. Starting from the left most picture, this is just past the surface so it holds its shape and looks very much what you would expect, a 7×7 grid of rectangles.
As you scan deeper you can see that the outer edge pieces extend further inwards and take up a majority of the real estate while all the inner pieces are squished in. That culminates into the right most picture where we have gone past the “outer core” and into the mostly hollow space where we see a bright dot for what is presumable a screw. And here we can see that the middle area, which looks very square on the outside, collapses towards the center. Yet the corners remain pretty rigid. We also see a center ball structure start to take place as the means of holding everything together.

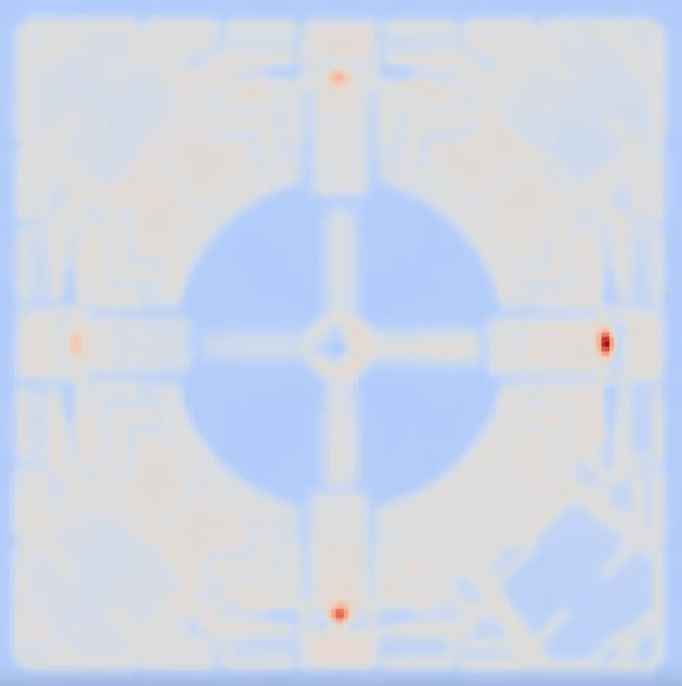

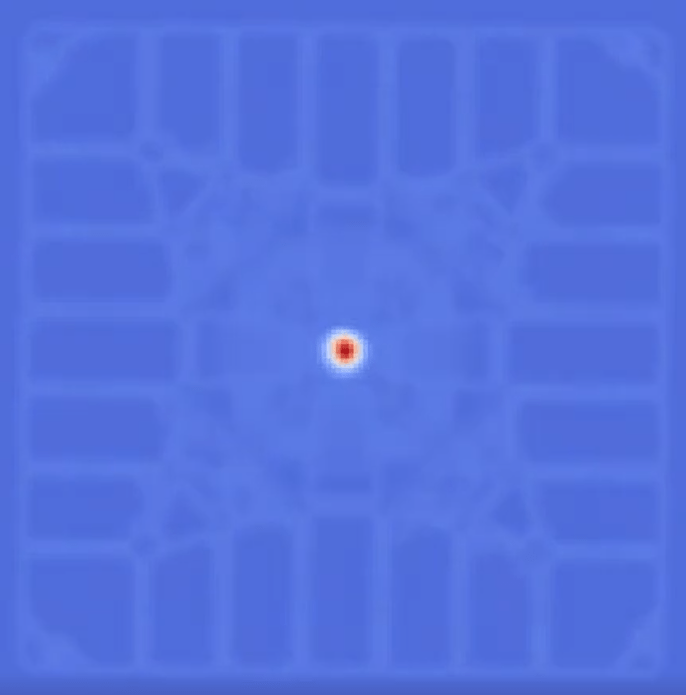
Diving even deeper as we get to the center you can see that the core is entirely a ball now. You can also see from the left most picture how each edge is connected to this ball core and we see that while the edge pieces are very thick and sturdy, the center pieces have long jagged paths to the core. Additionally, note how there are gaps of air between the pieces, this is another way that the design allows this to be turned very quickly.
The next two images are adjacent slices as we transition to within the ball core. And at the center of it all we can see the real core – screws connected to some piece of plastic in a + shape. This all culminates to the very center where it is just 4 screws that can be seen and all the artifacts associated with scanning metal. Then of course it repeats due to the symmetry that takes place.
Overall, the design of a speedcube is very fascinating. It takes a lot of brilliant design to even make a 7×7 in the first place, optimizing for turning speed and corner cutting is unthinkably impressive. Hats off to the designers and expect more to come about the actual project that I’m working on in the future.
